Tired of store-bought chocolate ice cream that promises a rich experience but delivers little more than a pale, faintly cocoa-flavored disappointment? You're not alone. Many of us yearn for that deep, dark, intensely chocolatey indulgence that only a truly decadent fudge ice cream can provide. This isn't just about a dessert; it's about a moment of pure, unadulterated pleasure, a scoop of velvety comfort that melts slowly on your tongue, leaving behind a lingering taste of real cocoa and luxurious fudge.
If your quest for the ultimate chocolate indulgence has led you down various grocery store aisles with little success, prepare to embark on a culinary journey that will change your perception of frozen treats forever. We’re talking about a homemade dark fudge ice cream: better than store-bought in every conceivable way. This authentic homemade chocolate fudge ice cream recipe isn't merely good; it's a revelation, delivering a depth of flavor and an unparalleled creaminess that mass-produced versions simply cannot achieve.
The Irresistible Allure of Authentic Homemade Chocolate Fudge Ice Cream
What truly sets an authentic homemade chocolate fudge ice cream apart from its mass-produced counterparts? It comes down to uncompromising quality and a passionate pursuit of flavor. Grocery store chocolate ice creams often skimp on cocoa solids and real chocolate, resulting in that "barely brown" look and a taste that's a shadow of what chocolate should be. When you crave chocolate, you want a dessert that shouts its presence, not whispers it.
This recipe is designed for those who appreciate the finer things in life, especially when those things involve a spoonful of rich, dark, and utterly fudgy ice cream. It leverages a proper custard base, a technique that, while requiring a little more time and attention than a simple no-churn recipe, yields a supremely smooth, dense, and creamy texture that no shortcut can replicate. While no-churn varieties offer a quick fix, they often fall short in achieving the silken mouthfeel and depth of flavor that a machine-churned, custard-based ice cream delivers. Think of it as the difference between a quick snack and a gourmet meal – both satisfy, but one leaves a lasting impression of true culinary craftsmanship.
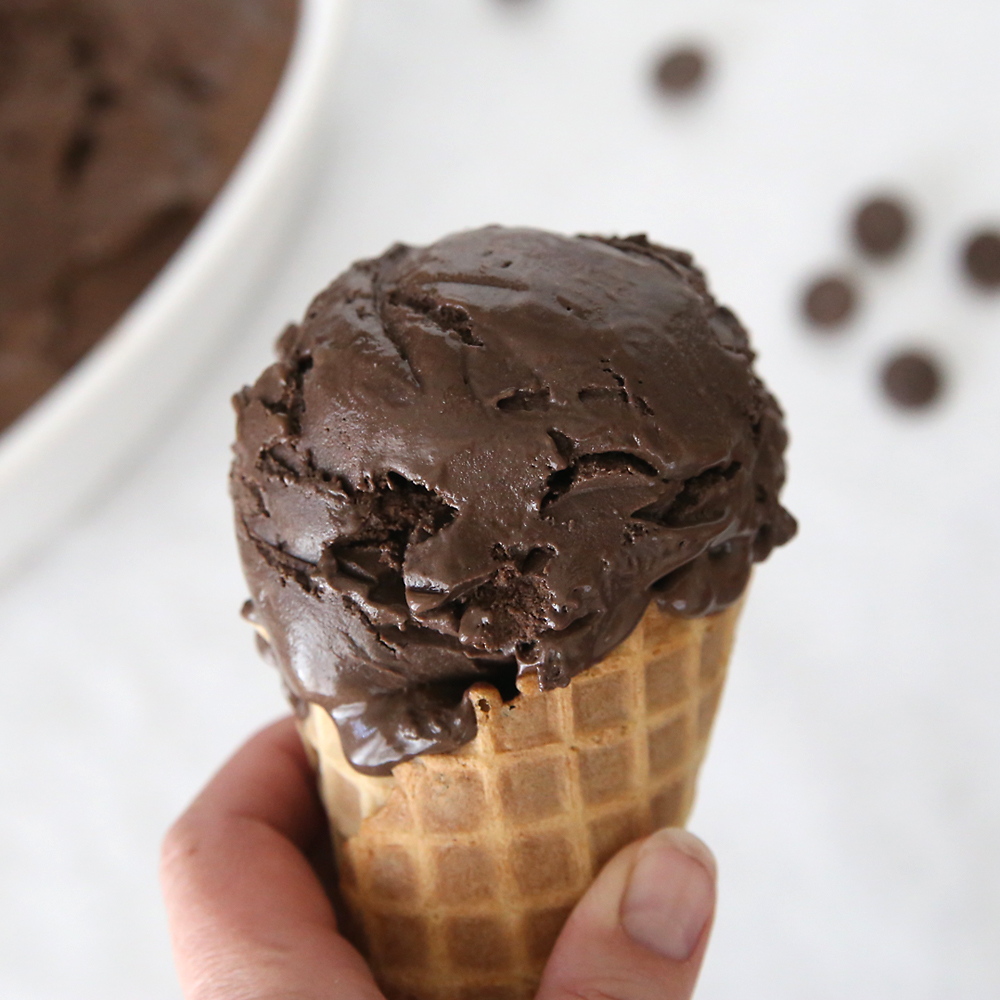
Beyond the superior taste and texture, there's an inherent joy in crafting something so special in your own kitchen. The aroma of rich chocolate heating on the stove, the satisfaction of whisking a smooth custard, and the anticipation as your ice cream maker hums away – it's all part of the experience. It’s an act of self-care, a reward after a long day, or the perfect centerpiece for a celebration. And once you taste this deep, dark, and incredibly creamy creation, you’ll understand why the journey is so incredibly worth it. Prepare to indulge in rich, dark homemade chocolate fudge ice cream like never before.
Crafting Your Decadent Homemade Chocolate Fudge Ice Cream: The Recipe
Creating this exquisite homemade chocolate fudge ice cream involves a couple of key stages, primarily making the rich custard base and then chilling and churning it to perfection. While it requires some planning due to the necessary chilling time, the process itself is straightforward and incredibly rewarding. Don't be intimidated by the steps; think of it as a labor of love that culminates in the most amazing dessert you've ever tasted.
Essential Ingredients:
- 1 cup Whipping Cream: The foundation for richness and body.
- 2 cups 2% Milk: Divided for separate stages, contributing to the creamy texture.
- 4 heaping tablespoons Unsweetened Baking Cocoa: Crucial for the intense, dark chocolate flavor. "Heaping" is key here!
- 6 oz (1 cup) 60% or darker chocolate chips: The source of deep, complex chocolate notes and fudginess. Using quality dark chocolate makes a significant difference.
- 1/2 cup Sugar: Balances the bitterness of the dark chocolate and cocoa.
- 1/2 teaspoon Salt: A secret weapon! It enhances and deepens the chocolate flavor, making it truly pop. Don't skip it.
- 5 Egg Yolks: The magic behind the creamy, velvety custard base, providing incredible richness and body to the ice cream.
- 1/2 teaspoon Vanilla Extract: A classic enhancer that rounds out the chocolate profile beautifully.
Equipment You'll Need:
- Ice Cream Maker: Essential for achieving the perfect texture. For smaller countertop machines that don't use ice, this recipe yields about 1.5 quarts. If you have a larger, traditional ice-and-salt machine, consider doubling the recipe.
- Medium pot, large bowl, whisk, heat-safe spatula.
Step-by-Step Instructions:
- Prepare the Chocolate Base: In a medium pot, combine the whipping cream and heaping unsweetened baking cocoa. Heat over medium heat, whisking continuously until the cocoa is fully dissolved and the mixture is smooth. Just as the edges begin to gently bubble, remove the pot from the heat.
- Melt in the Dark Chocolate: Immediately add your dark chocolate chips to the hot cream and cocoa mixture. Let them sit undisturbed for a few minutes to soften. Then, stir thoroughly until the chocolate is completely melted and the mixture is silky smooth.
- Integrate First Milk Portion: Whisk in one cup of the 2% milk until fully combined. Pour this decadent chocolate mixture into a large bowl and set it aside. This will be the base for our fudge.
- Begin the Custard: In the same medium pot (no need to wash it!), combine the remaining cup of 2% milk, sugar, and salt. Heat over medium heat, stirring occasionally, until the sugar and salt are fully dissolved and the mixture is warm.
- Temper the Egg Yolks: While the milk mixture heats, separate your 5 eggs, carefully reserving the yolks and discarding the whites (or save them for another recipe!). Lightly whisk the egg yolks in a separate small bowl. This is a crucial step for a smooth custard.
- Combine Custard Components: Once the milk, sugar, and salt mixture is warm, slowly pour a small amount (about 1/2 cup) of the warm milk into the whisked egg yolks, whisking constantly. This "tempers" the yolks, preventing them from scrambling. Then, pour the warmed yolk mixture back into the pot with the rest of the warm milk, whisking vigorously to ensure full integration.
- Thicken the Custard: Continue heating the milk and egg yolk mixture over medium heat, stirring constantly with a spatula, until it thickens sufficiently to coat the back of a metal spoon. Do not let it boil, as this can curdle the eggs.
- Combine and Cool: Immediately remove the thickened custard from the heat and pour it directly over the chocolate mixture you set aside earlier. Add the vanilla extract and stir until everything is completely combined, creating a unified, glossy, dark chocolate custard.
- Chill for Perfection: Cover the bowl tightly (plastic wrap pressed directly onto the surface helps prevent a skin from forming) and refrigerate for a minimum of 5-6 hours, or preferably overnight, until the mixture is thoroughly chilled. This chilling step is vital for optimal churning and a smooth, creamy final texture.
- Churn and Enjoy: Once completely chilled, pour the base into your ice cream maker and freeze according to the manufacturer's instructions. You can enjoy it immediately for a soft-serve consistency, or transfer it to an airtight container and freeze for another 1-2 hours for a firmer, scoopable ice cream.
Course: Dessert
Tips for Perfection: Elevating Your Homemade Ice Cream Experience
Making homemade chocolate fudge ice cream is a wonderful culinary endeavor, and with a few extra tips, you can ensure every batch is nothing short of perfection.
- Embrace High-Quality Ingredients: The darker the chocolate (60% or higher), the richer and more profound your ice cream will taste. Fresh, large egg yolks and good quality vanilla extract will also significantly impact the final flavor profile.
- Don't Skimp on the Chill Time: This cannot be stressed enough. A properly chilled base ensures that your ice cream freezes efficiently and creates smaller ice crystals, resulting in a much creamier, smoother texture. Rushing this step often leads to an icier, less satisfying product.
- Master Tempering: Tempering egg yolks is simple but critical. The slow addition of hot liquid to the yolks, while whisking, prevents them from scrambling. If you're nervous, do it over a double boiler or off the heat initially.
- Taste and Adjust: Once the custard base is fully combined (before chilling), give it a taste. If you prefer it slightly sweeter, you can add a tablespoon or two more sugar and stir until dissolved. Remember, flavors mellow when cold, so it should taste a tiny bit stronger than you might expect.
- Consider Your Add-ins: While this recipe is fantastic on its own, it also serves as a superb canvas for creativity. Consider swirling in extra homemade fudge sauce, finely chopped dark chocolate pieces for textural contrast, a handful of toasted pecans, or even a hint of espresso powder to deepen the chocolate notes further. Add these during the last 5 minutes of churning, or layer them into your container before the final freeze.
- Optimal Storage: For the best texture and to prevent freezer burn, store your finished homemade chocolate fudge ice cream in an airtight container. Press a piece of parchment paper or plastic wrap directly onto the surface of the ice cream before sealing the lid. This minimizes air exposure and helps maintain its creamy consistency for up to two weeks.
Serving Suggestions & Storage
Your freshly churned homemade chocolate fudge ice cream will be soft and luscious, perfect for a spontaneous spoonful straight from the machine. For a firmer, more traditional scoop, allow it to freeze in an airtight container for at least an hour or two. This also allows the flavors to fully meld and deepen.
This decadent dessert is fantastic on its own, but it also pairs beautifully with a variety of accompaniments. Imagine a scoop atop a warm brownie, alongside fresh berries, or perhaps drizzled with a contrasting raspberry or caramel sauce. For the ultimate chocolate lover, serve it with extra hot fudge and a dollop of freshly whipped cream. Stored correctly, this ice cream will remain a delightful treat for about two weeks, though we doubt it will last that long!
Conclusion
Embracing the process of making your own homemade chocolate fudge ice cream is a journey towards true culinary satisfaction. It’s an escape from the ordinary, a defiance of bland supermarket offerings, and a celebration of rich, unadulterated flavor. From the careful crafting of the custard base to the exhilarating moment of the first scoop, every step is an investment in a dessert experience that is profoundly rewarding. So, arm yourself with quality ingredients, your trusty ice cream maker, and a little patience, and prepare to discover the unparalleled joy and exquisite taste of the best dark chocolate fudge ice cream you’ll ever have. Happy churning!
